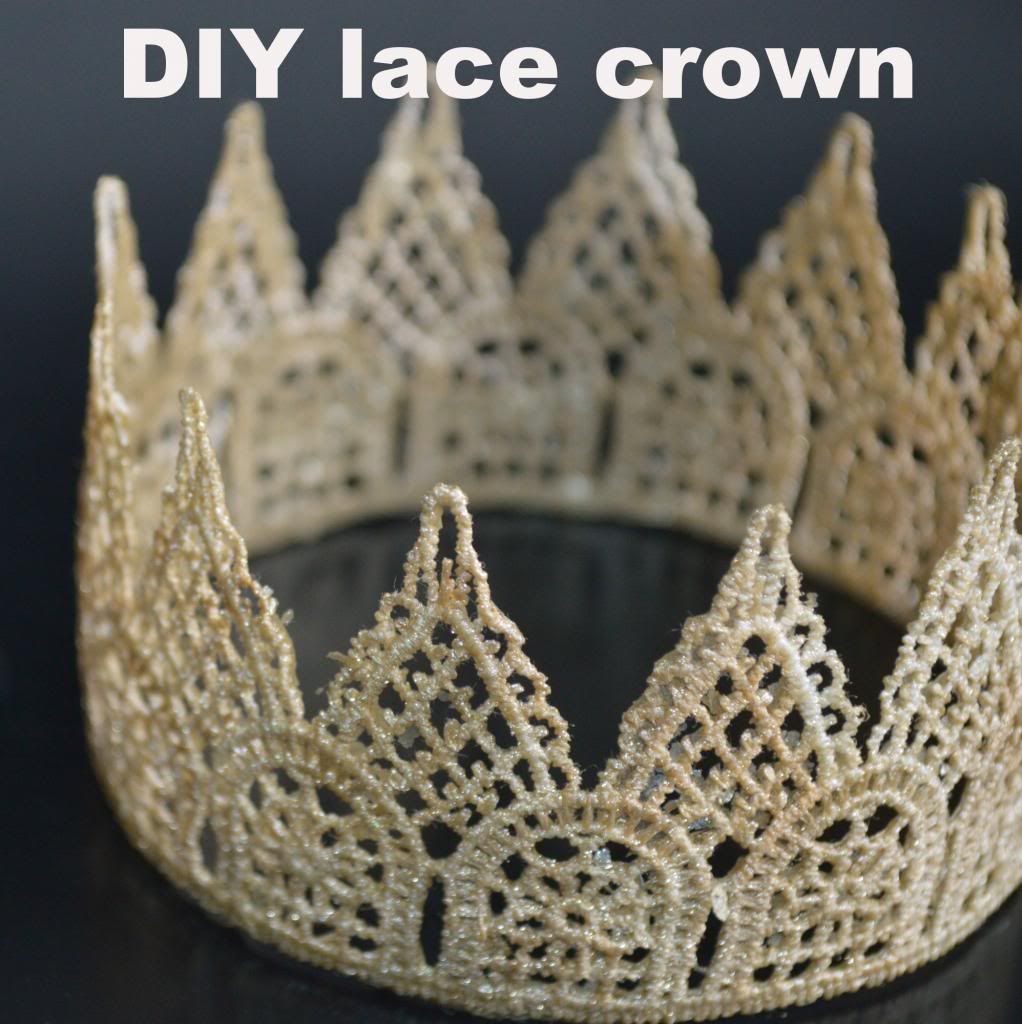
When Phillip surprised me with my "push gift" DSLR I immediately started planning mini photo shoots of my newborn at home. I'm no professional (believe you me) but that didn't stop me from trying to mimic photos I've pinned over the past few years. One thing I've always wanted was a picture of my baby with a little crown on. After all, these boys are our little princes.
This was a VERY quick and easy DIY project. If you know me at all, then you know that easy diy's are the only diy's I attempt. Mostly because when I have an idea for something, I want to see the finished product asap. I need to work on that whole "patience is a virtue" thing.
What you'll need >>>
Fabric stiffener | I used Aleene's from joann fabrics with a 40% off coupon. You can also use mod podge
Lace | Pick one with the thickness and shape you like
Paint | this is only if you don't want the finished product to be the same color as the lace (most likely white). I wanted a gold crown and, lucky me, I happened to have some gold pain from a previous easy diy. ** paint must be water-based acryclic
Bowl
Form/mold | I started off with a vase but it wasn't the right size so I switched to a candle jar. Choose a cylinder object that is the approximate size of the crown you would like.
not pictured >>>
Parchment paper
Tape
Steps >>>
Here's where the "bad blogger" in me stepped in... I didn't get pictures of the process but honestly, it was just so easy and quick. Plus my hands were too icky to pick up a camera.
- Wrap your piece of lace around the mold to see where the two ends would meet
- Cut to the size you need. I actually recommend going a little past that point so that the lace will overlap a tiny bit
- Now wrap the mold in parchment paper and tape it so that it stays
- Pour enough fabric stiffener in the bowl to coat the lace
- Mix in your paint of choice until it is your desired color
- Dip the lace into the mixture and coat. I rolled it, smashed it, etc. until it was completely covered. You should really wear gloves for this but impatient Eliza wasn't having any of that.
- Then pick up the lace from the mixture and slide between two fingers to remove any excess liquid.
- The entire lace piece should be completely moist but not dripping in stiffener
- Wrap the lace around your mold as pictured below. The lace should be moist enough to cling onto the cylinder object.
- Allow to dry. I did mine late at night and left it sitting overnight. In the morning, all I had to do was remove from the mold and peel off the parchment paper and {obviously} marvel at my handy work. It was perfect!
And here it is on my little model :)
He approves


Awesome post, thanks for sharing this post..
ReplyDeleteNice post, i hope everyone will like your post..
ReplyDelete201594dongdong
ReplyDeleterolex watches outlet
longchamp handbags
air jordan 11
cheap nfl jerseys
uggs sale
michael kors handbags
ralph lauren outlet
louis vuitton handbags
coach factory outlet
michael kors outlet
tory burch sale
air max uk
abercrombie and fitch new york
ugg boots outlet
oakley sunglasses
coach factory outlet online
coach factory outlet online
abercrombie fitch,abercrombie and kent,abercrombie & fitch,abercrombie outlet,abercrombie kids
louis vuitton handbags
tory burch outlet
air max 90
toms outlet
cheap uggs
adidas uk
fake oakley sunglasses
jordan 11
true religion
coach outlet stores
nike free runs
ugg outlet
tory burch outlet
barbour coats
Abercrombie And Fitch Kids Online
ReplyDeleteMichael Kors Handbags Outlet Deals
nike trainers
Louis Vuitton Handbags Factory Store
hermes birkin bag
Michael Kors Online Outlet Shop
uggs australia
ugg boots australia
ugg outlet store
canada goose jackets
cheap uggs
michael kors bags
Official Coach Factory Outlet Online Sale
ugg boots sale
ugg boots
michael kors outlet
Louboutin Red Bottoms Shoes Outlet
michael kors handbags
coach outlet
Michael Kors Outlet Sale Clearance
Louis Vuitton Outlet USA
air max 90
Louis Vuitton Bags On Sale
air max 95,nike golf,nike janoski,air max 1,nike canada,nike plus,nike shox,nike factory store
coach factory outlet
michael kors
Air Jordan 3 III Retro Free Shipping
Gucci Outlet Online Sale
ugg boots
michael kors outlet sale
christian louboutin uk
ReplyDeletetrue religion jeans
hollister outlet
louis vuitton outlet
dallas mavericks jerseys
christian louboutin paris
canada goose
rolex watches
fitflops
mont blanc pens
201611.26wengdongdong
ugg outlet clearance
ReplyDeletelongchamp le pliage
gucci handbags
uggs outlet
bears jerseys
burberry outlet
ed hardy outlet
pandora jewelry
asics shoes
hollister
louis vuitton outlet
ReplyDeletelouis vuitton
air jordan shoes
louis vuitton
mbt outlet clearance
tods shoes
ray ban sunglasses uk
nike nfl jerseys
coach handbags
adidas superstar
chenlina20170214
nike air force
ReplyDeleteyeezy boost 350
michael kors outlet online
cheap jordans
nike huarache
air max thea
true religion jeans
michael kors outlet online
harden shoes
Kanye West shoes
nike tn
ReplyDeletenike air force 1
polo ralph lauren outlet
michael kors handbags
ralph lauren outlet online
arizona cardinals jerseys
cheap nhl jerseys
moncler outlet
nike outlet store
moncler jackets