Showing posts with label DIY. Show all posts

Friday, April 4, 2014

DIY || Lace Crown


easy DIY lace crown

 
When Phillip surprised me with my "push gift" DSLR I immediately started planning mini photo shoots of my newborn at home. I'm no professional (believe you me) but that didn't stop me from trying to mimic photos I've pinned over the past few years. One thing I've always wanted was a picture of my baby with a little crown on. After all, these boys are our little princes. 
 
This was a VERY quick and easy DIY project. If you know me at all, then you know that easy diy's are the only diy's I attempt. Mostly because when I have an idea for something, I want to see the finished product asap. I need to work on that whole "patience is a virtue" thing.
 
What you'll need >>>


Fabric stiffener | I used Aleene's from joann fabrics with a 40% off coupon. You can also use mod podge
 
Lace | Pick one with the thickness and shape you like
 
Paint | this is only if you don't want the finished product to be the same color as the lace (most likely white). I wanted a gold crown and, lucky me, I happened to have some gold pain from a previous easy diy. ** paint must be water-based acryclic
 
Bowl
 
Form/mold | I started off with a vase but it wasn't the right size so I switched to a candle jar. Choose a cylinder object that is the approximate size of the crown you would like.
 
not pictured >>> 
 
Parchment paper
 
Tape 
 
Steps >>>
 
Here's where the "bad blogger" in me stepped in... I didn't get pictures of the process but honestly, it was just so easy and quick. Plus my hands were too icky to pick up a camera.
  • Wrap your piece of lace around the mold to see where the two ends would meet
  • Cut to the size you need. I actually recommend going a little past that point so that the lace will overlap a tiny bit
  • Now wrap the mold in parchment paper and tape it so that it stays
  • Pour enough fabric stiffener in the bowl to coat the lace
  • Mix in your paint of choice until it is your desired color
  • Dip the lace into the mixture and coat. I rolled it, smashed it, etc. until it was completely covered. You should really wear gloves for this but impatient Eliza wasn't having any of that.
  • Then pick up the lace from the mixture and slide between two fingers to remove any excess liquid.
  • The entire lace piece should be completely moist but not dripping in stiffener
  • Wrap the lace around your mold as pictured below. The lace should be moist enough to cling onto the cylinder object.
 
 
  • Allow to dry. I did mine late at night and left it sitting overnight. In the morning, all I had to do was remove from the mold and peel off the parchment paper and {obviously} marvel at my handy work. It was perfect!
 
And here it is on my little model :) 


diy lace crown


newborn lace crown diy
 
He approves


Tuesday, October 15, 2013

DIY | toddler infinity scarf


Today I have a super easy (and cute) DIY for the babe in your life. An infinity scarf that's perfect for the Fall weather (although it's still in the 80's by me...)  and the best part? No sewing. Whatsoever. I don't know about you but the only DIY's I actually attempt are ones with only a few steps. Otherwise, I just get overwhelmed and lose interest before it's done.

What you'll need >>>>
 
 
a cotton, jersey knit t-shirt in your preferred color. I bought a gray one for around $2 at JCP on the clearance rack. It was a boys XL size and by looking at it, I knew it was the perfect size. (width of about 16 inches)
 
scissors
 
fabric paint - purchased at Michaels with a 50% off coupon
 
brush or stamp - I used a cheap makeup brush that came in a kit
 
optional: you can use a stencil if you'd like. Although, if you are wanting a specific design like a star or lightening bolts, I would opt for a stamp over a stencil
 
Step by step >>>>
 
1 - Cut the fabric to the desired width. I cut of the top part first (the sleeves) because I wanted to test the size on my son before making it any smaller. Also, cut off the bottom hem. This fabric won't fray.
 
I decided to go with 12 inches and it's perfect for him.


2 - Paint! Put a small amount of paint in a dish for dipping. I didn't want too much paint on the brush to avoid making mistakes or creating messy lines.  


3 - Pick a design. We went with triangles. And by we, I mean me and the husband (he had a say in it too!) 

For this step, you can use a stencil or a stamp. I imagine a stamp would make it much faster to complete but I didn't mind the extra quiet time to focus on this project.  

Make sure not to press down too hard so that the paint does not bleed through to the other side. OR you can place a piece of cardboard in between the two layers just in case.


4 - Allow the paint to dry and then try it on your sweet babe.
 
It's still pretty warm here so I paired it with some shorts for the purpose of these pictures.


Cruze loves his little scarf and so do I! It was a fun and super easy project that was pretty inexpensive to make. I think all of the materials that I purchased came out to UNDER $4! Now I have a bottle of fabric paint for my next DIY...

So what do you think? Will you be trying this for your little one(s)? It works great for adults too! Just use a bigger tee ;)

linking up with...


and

Tuesday, September 17, 2013

Great {easy} DIY's For Fall!


Ahhhh... Do you smell it too? Semptember hits and suddenly the air is filled with the sweet aromas of cinnamon, pumpkin spice and nutmeg. It's my favorite time of year. Even though we live in Florida... I still go along with all of the motions. I bake pumpkin desserts, I rock scarves and boots heck - I even break out the fall colored decor.
 
I put together a list of the best (which also means easiest in my book) DIY's that can help you get into the Fall mindset. They are in no particular order because Blogger just won't let me arrange them the way I want to. :/

So here we go!

Painted Pumpkins

{photo}

Glittered Candle Holders


{photo}
Pumpkin Spice Sugar Scrub!

{photo}


Leaf Shaped Gingerbread Marshmallows
(combine the next two - you get it)

{photo}
{photo}


Oatmeal Bath
great for the dry skin that can come along with the cooler (oh so fresh) weather


{photo}


Sweater Pillows
So Cozy
{photo}

Burlap Wreath
{photo}
No Sew T-Shirt Infinity Scarf


{photo}
Cozy Leg Warmers
These are from etsy but I think they would be a great DIY. Think, old sweater sleeves. Perhaps the same sweater you used to make that adorable pillow above?


{photo}


I really hope I can get around to some of these fun DIY's. I'll be sure to share when I do! So tell me, what do you think of these?

Thursday, December 20, 2012

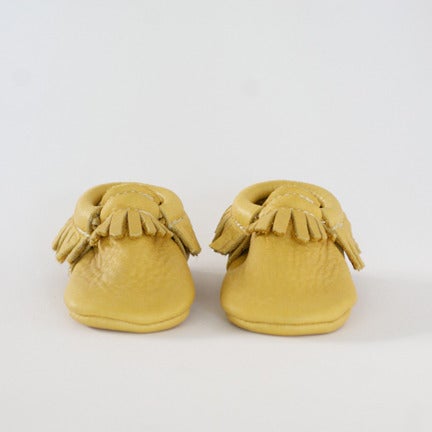
Moccasin Love


ZUZII__0002_Grey_Moccasin
Zuzzi / Mox Boots


Freshly Picked / Elk Hide Mocassins


DIY baby moccasins
A Beautiful Mess / DIY Moccassins

 Yes, I'm in love with moccasins. Especially baby moccasins. How gorgeous are the first two? I know.

The last picture is from a DIY post on A Beautiful Mess Blog. For the crafty and budget minded mama, these are a great option. I really wish I knew how to sew...

Tuesday, June 21, 2011

Baby On A Budget: DIY Oatmeal Baby Bath

Here is a very inexpensive way to help soothe your childs sensitive skin.

Ingredients: 1-2 cups of oats (not instant)


That's all! Now just use a blender or food processor to grind the oatmeal to a powder texture. Pour the contents into a warm bath and mix with your hand to be sure that the oats don't sink to the bottom. That's easy enough, huh?

It's a great, inexpensive way to give your baby a nice bath while soothing their skin. It works wonders for eczema and itchy, dry skin in general. Also, feel free to add a few drops of lavender oil to the bath for extra relaxation, just be sure to check with your physician to see if your child is old enough.

Wednesday, April 27, 2011

Baby On a Budget: baby wipe solution

There are so many great websites out there with directions on how to make your own baby wipe solution. With the growing number of mama's who are choosing to go the cloth diaper route it seems logical that many mothers would also try to make their own baby wipe solution. Good reasons for doing this are cost savings, less waste and of course, it can be much better for your baby depending on the ingredients you decide to use. After reading many different recipes for the solution I decided on this:

2 cups of water
2 tablespoons of natural baby wash
2 tablespoons of olive oil
1-2 drops of lavender oil

There are many different solutions out there so browse around if you are looking for something different. After making the solution you can either put it into an inexpensive spray bottle and spray on a paper towel or reusable wipes (flannel fabric is great for this) as you go or spray several sheets of paper towel and put in a disposable wipes case for quick access.

I hope this helps! It’s a great way to do your part for the environment, save money and your baby’s bottom all at the same time! J

Monday, March 28, 2011

My Home-Made Baby Wrap


Here is a picture of my Moby Wrap that I wrote about here: http://babycravings.blogspot.com/2011/03/baby-on-budget-home-made-moby-wrap.html

I'm not done with it, I want to add some detail to the front so that it would be easier to identify the middle of the wrap and also to personalize it for my sister-in-law. Any suggestions?

Wednesday, March 23, 2011

Baby on a Budget: home-made Moby wrap

So while we're here in Bolivia I decided I could take the extra time on my hands that would usually be spent watching TV, to learn a few things. A few years ago my mom gave me a sewing machine and I have been wanting to learn how to sew..... so that's exactly what I'm doing and I am so excited about it. My brother and his wife are currently expecting their first child and so my first project is a home-made Moby wrap. I love love love Moby wraps and anything like them. They start at around $40 and go way up from there but when I look at them I can't help but think how simple it is. The fabric on most is just a cotton jersey knit. My friend emailed me the dimensions of hers and off I went! I purchased the fabric at the local mercado (outdoor market) and started my lessons with a very kind Bolivian native.

Now let me just say you don't have to sew anything if you don't want to for the Moby wrap but I can be kind of a perfectionist sometimes and I want it to look professional. We cut out the pattern and started sewing. First we just folded over the edges and did a straight-stitch (I think that's what it's called) to enforce the ends and then we surged over that. It looks great and I can't wait to give it to my sister-in-law when we get back.

I also made one for myself... I know, I know.... I don't need it right now but I like saving money and this will save me money down the line.

Have any of you made a wrap? What fabric did you use and do you think it's worth doing it yourself?

I'll post pictures of the finished product soon!
Pin It!

LinkWithin

Related Posts Plugin for WordPress, Blogger...